
To activate GuardedID after it has been installed, perform the following steps:
Step 1: Locate the GuardedID taskbar icon:

Step 2: Right-click the icon, then select License Manager.
Step 3: Type your full Activation Key including dashes (Example: ABCD-1234-ABCD-1234-ABCD) in to the License Key text box:

Note: If you have already entered a license key but would like to change it (for example, if you are replacing an expiring/expired license key), you must click the Deactivate button first before entering your new license key.
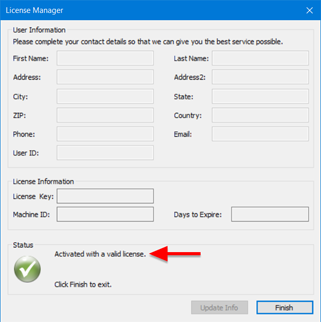
Step 4: Click the Activate button, then wait for the activation confirmation message:
Step 5: GuardedID is now activated and its taskbar icon no longer shows a warning symbol:

Please contact StrikeForce Technical Support if you encounter an error during the activation process.

